Dragging and exporting
Every way to get an idea out of TranceTools: as MIDI clips you drag, MIDI files you export, or audio rendered through the built-in sound.
Which one to use
| You want | Use | You get |
|---|---|---|
| One part on your own synth | Drag a lane | A MIDI clip |
| Every part at once | Drag All | One multi-track MIDI file |
| Lots of options to pick from later | Export Variations | 8, 16 or 32 multi-track MIDI files |
| A quick audio bounce of the loop or a section, for reference | Export Audio Stems | A WAV per part, plus the mix, in the built-in sound |
| A quick audio bounce of the whole song, for reference | Export Song as WAV | A mix, or a mix and a stem per part, in the built-in sound |
Note: dragging and exporting need activation. Without it, lanes say ACTIVATE TO DRAG. See Activation.
Drag a part
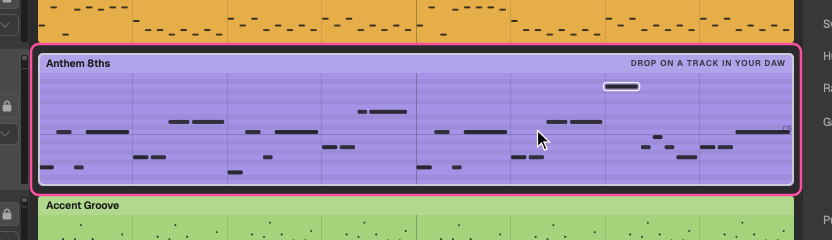
Drag any lane onto a track or clip slot in your DAW. While you drag, the lane says DROP ON A TRACK IN YOUR DAW (or names your DAW, such as DROP ON A BITWIG TRACK, in the plugin or when Bitwig or Live is linked). It drops in as a plain MIDI clip; nothing is added to your device chain.
The clip contains what you're hearing: the loop, the section you've chosen, or, in Song, the section shown in the lanes (or the whole song). Feel, the trance gate, pump (CC 11) and filter sweeps (CC 74) come with it.
Clip names
A dragged clip is named after the part, key and tempo, with the section after the part when it isn't the loop:
- TT Lead · Am · 138
- TT Lead · Drop · Am · 138
- TT Bass · Song · F♯m · 140
The name is in the file name, for DAWs that use that, and in the MIDI file's track name, which Ableton Live uses for the clip. Live can't show the dots or the sharp sign there, so in Live the clip reads TT Lead - Am - 138, with sharps as # (TT Bass - Song - F#m - 140).

Drag All
Drag All, in the top bar, drags every part in the idea as one multi-track MIDI file, with a track per part named after it. Its label tells you what it will drag: DRAG ALL PARTS for the loop, DRAG THE DROP (and so on) for a section, DRAG THE SONG for the whole song.
In multi-track files, the drums are on MIDI channel 10, as General MIDI expects. See MIDI channels.
Export Variations
File > Export Variations… writes 8, 16 or 32 new takes on the idea as multi-track MIDI files. Choose a folder, and TranceTools makes a folder in it called TranceTools variations with the date and time.
Locked parts and locked chords stay the same in every variation, so lock what you like first.
Export Audio Stems
The two audio exports below play through the built-in sound. They're for a reference or a quick bounce to share; for the finished track, drag the MIDI onto your own synths and render it in your DAW.
File > Export Audio Stems (WAV)… renders what you're hearing (the loop or a section) through the built-in sound: one WAV per part plus the mix, at 48 kHz, 24-bit. Choose a folder, and TranceTools makes a dated TranceTools stems folder in it. Each part's sound, volume and pan are used.
Export Song as WAV
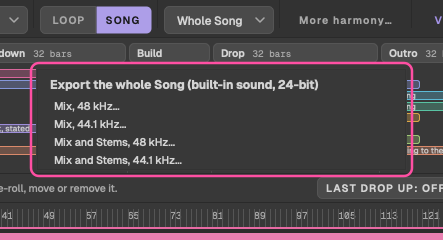
File > Export Song as WAV… renders the whole song as the timeline has it, whichever section you're looking at: every section, its takes, the last-drop lift and the FX. It plays through the built-in sound with each part's sound, volume and pan, plus the echo, reverb and limiter.
Choose one of four options:
- Mix, 48 kHz
- Mix, 44.1 kHz
- Mix and Stems, 48 kHz: the mix plus a WAV per part.
- Mix and Stems, 44.1 kHz
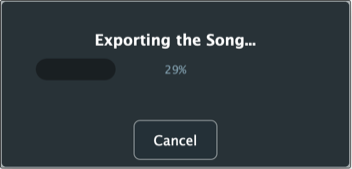
All are 24-bit stereo, with a two-second tail for the reverb. The files go in a dated folder. The song renders in the background with a progress bar; Cancel stops it and removes what it wrote.
Tip: the same idea always renders the same audio, so you can export again later and get an identical file.
If an export fails
If a drag or export can't write its files, TranceTools says so in the status bar, with a guess at why (the folder has gone, there's no permission to write there, or the disk is full) and what to do next. If only some files were written, it says how many. Long folder paths are shortened in the message; the full path goes in the app's log.