Getting started
From the loop in your Session View to a full trance track in Arrangement View. Short steps, one screen at a time.
What you need
A Mac (Apple silicon or Intel) with Ableton Live 12 or later, and a loop you like in Live's Session View: a clip on each track, such as kick, bass, lead and pad. You don't need Max for Live.
Arrange uses your own tracks, synths and sounds. It doesn't make any notes: it lays out the loop you already have, adds locators, and writes the automation a trance track moves with.
No loop yet? Make one in TranceTools Spark, then drag each part onto a clip slot in the same row of Session View.
Install the app
Open the download and drag TranceTools Arrange into Applications. Then open it.
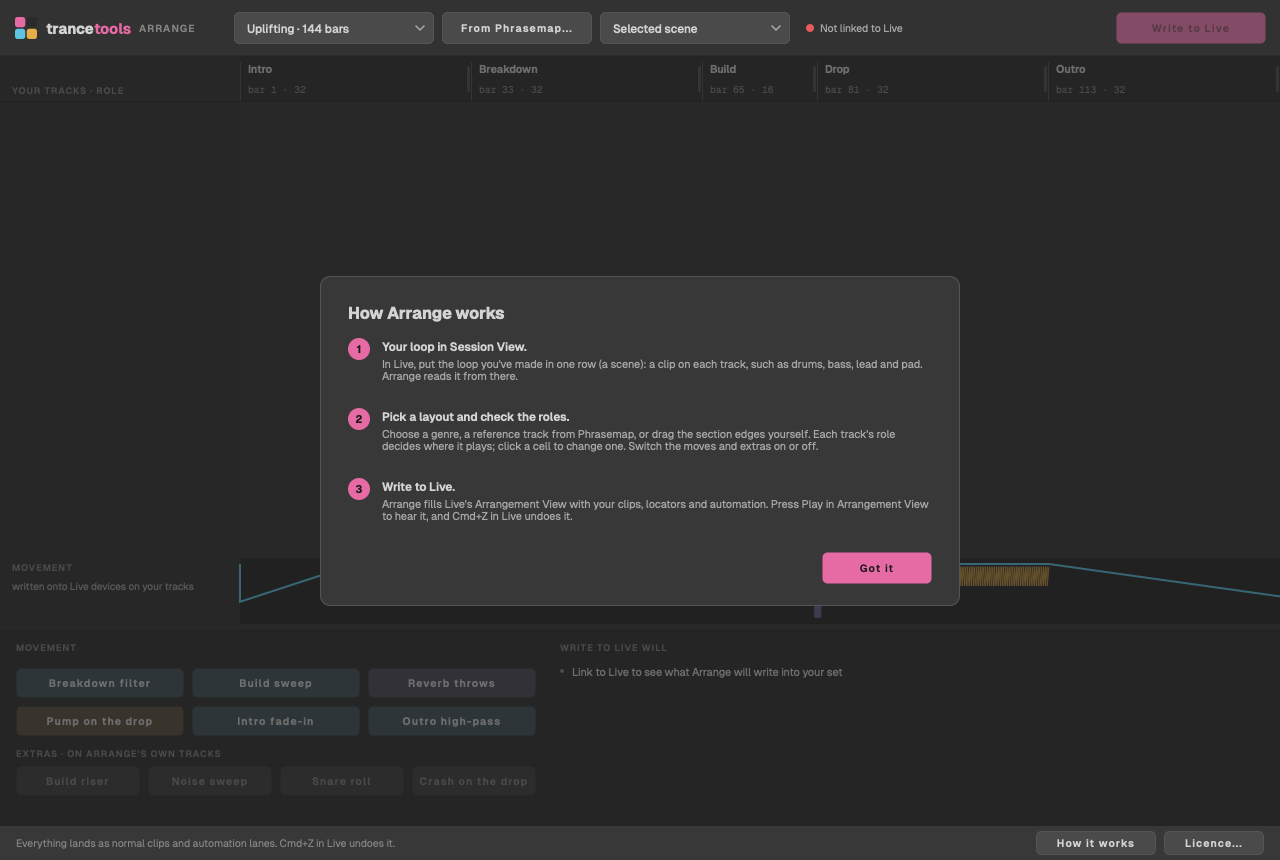
The first time, Arrange shows How Arrange works: your loop in Session View, pick a layout and check the roles, then Write to Live. Click Got it. You can see it again with How it works at the bottom of the window.
Install the Live script
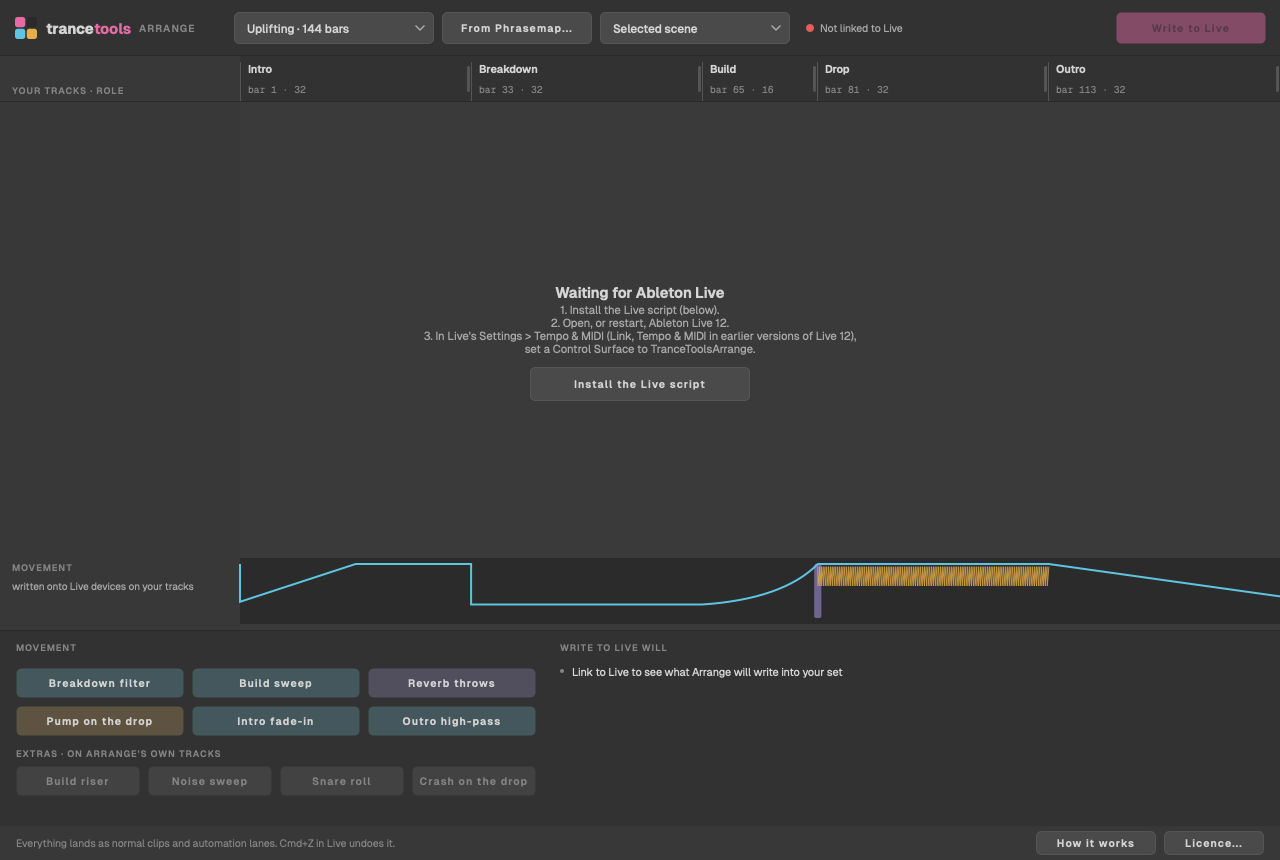
Arrange talks to Live through a Live script (a Control Surface). Until it's linked, the window says Waiting for Ableton Live and lists what to do next.
- Click Install the Live script. It goes into your Live User Library, in Remote Scripts/TranceToolsArrange.
- Open Ableton Live 12, or restart it if it was already open. Live only finds new scripts when it starts.
Link it to Live
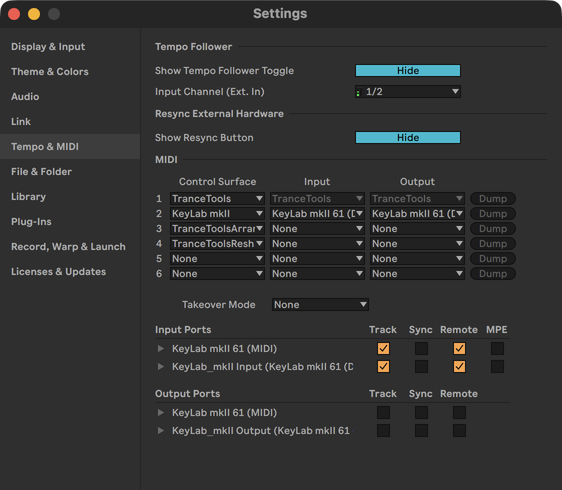
In Live, open Live > Settings (Cmd+,) and go to Tempo & MIDI (Link, Tempo & MIDI in earlier versions of Live 12). In an empty Control Surface slot, choose TranceToolsArrange, with Input and Output both set to None.
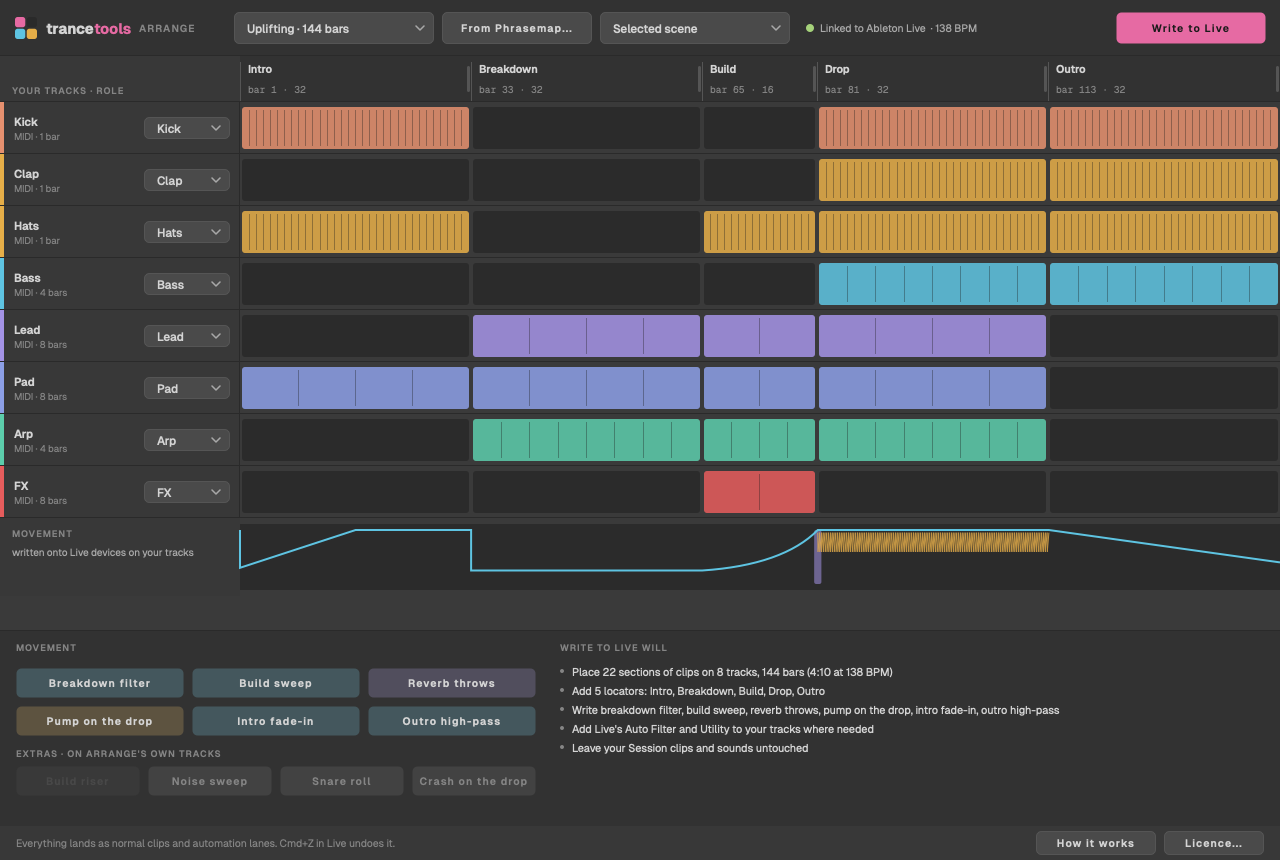
Back in Arrange, the dot at the top turns green and says Linked to Ableton Live, with Live's version and your set's tempo. More in Live setup.
Put your loop in Session View
Put the loop in one row (a scene) of Live's Session View. In Arrange, choose that row from the Scene menu at the top; it shows how many clips each row holds. A track with no clip in that row uses its first clip.
Your tracks appear in Arrange by themselves: it looks at your set again every few seconds. Each gets a role, guessed from its name, which decides where it plays. See Tracks and roles.
Pick a layout
The Layout menu has seven genre layouts, each with an intro, breakdown, build, drop and outro. Or click From Phrasemap… to use a reference track's sections, or drag the section edges yourself. See Layouts.
Write to Live
Check the list under Write to Live will, then click Write to Live. A full track takes a few seconds, with a progress bar at the bottom. Writing needs a licence; everything before it works without one.
When it's done, the bottom of the window says, for example, Done: 334 clips on 8 tracks, 5 locators. Cmd+Z in Live undoes it.

Hear it
Switch Live to Arrangement View and press Play. If you hear your loop instead of the arrangement, Session clips are still playing: stop them, or click Live's orange Back to Arrangement button.
Not what you wanted? Press Cmd+Z in Live to undo it, change something in Arrange, and write again. More in Writing to Live.